Unlock Unforgettable Flavor: Easy Grilled Brussels Sprouts Pro Tips
Once considered a polarizing vegetable, Brussels sprouts have undergone a culinary renaissance, particularly when kissed by the flames of a grill. Forget the mushy, bitter versions of your youth; properly grilled Brussels sprouts are a revelation. They emerge from the grill with a beautifully caramelized exterior, a tender, sweet interior, and a delightful smokiness that transforms even the most staunch skeptics into fans. Whether you're a seasoned griller or just starting out, mastering these little green gems is surprisingly simple and incredibly rewarding. Get ready to discover your new favorite side dish!
Why Grilled Brussels Sprouts Are a Game Changer
The magic of grilling Brussels sprouts lies in the unique combination of high heat and direct flame. This process brings out a depth of flavor that other cooking methods simply can't achieve. As the sprouts cook, their natural sugars caramelize, creating a slightly sweet, nutty, and wonderfully crispy outer layer. Simultaneously, the interior steams to a perfect tenderness, avoiding the dreaded sogginess often associated with overcooked sprouts. This contrast in texture – crispy on the outside, succulent on the inside – is what makes them so addictive. They become the perfect accompaniment to almost any meal, from a simple weeknight chicken to an elaborate barbecue spread, making them an excellent choice for Grill Perfect Brussels Sprouts: Crispy Outside, Tender Inside.
Essential Preparation Steps for Perfect Sprouts
Achieving perfectly grilled Brussels sprouts isn't just about throwing them on the grates. A little preparation goes a long way in ensuring they cook evenly and taste fantastic. These simple steps are crucial for optimal results.
Selecting and Cleaning Your Sprouts
- Choose Wisely: Look for Brussels sprouts that are firm, bright green, and tightly packed. Avoid any with yellowing leaves or soft spots. Smaller sprouts tend to be sweeter and cook more uniformly.
- Trim and Clean: Start by trimming off the tough, woody stem end of each sprout. Remove any loose or discolored outer leaves. A quick rinse under cold water is usually sufficient for cleaning.
The Non-Negotiable Pre-Cook: Blanching or Microwaving
This is perhaps the most critical step that many home cooks overlook. Direct grilling alone can lead to burned outsides and still-raw insides. A brief pre-cook ensures that your sprouts soften slightly before hitting the heat, allowing them to cook through evenly while still developing that desirable char.
- Microwave Method: Our preferred method for speed and efficiency. Place your trimmed Brussels sprouts into a large, microwave-safe mixing bowl. Add a splash of water (about 1-2 tablespoons) and cover the bowl (or use plastic wrap with a small vent). Microwave on high for 3 minutes. This quick steam treatment softens them just enough without making them mushy. Let them cool slightly so you can handle them comfortably.
- Boiling/Blanching Alternative: For those without a microwave, you can briefly blanch the sprouts in boiling salted water for 2-3 minutes, then immediately plunge them into an ice bath to stop the cooking before draining thoroughly.
Seasoning for Success
Once pre-cooked and cooled, your sprouts are ready to absorb some incredible flavors. The key is a good coating of fat and your chosen seasonings. A simple yet effective base includes:
- Olive Oil: Essential for helping the sprouts char beautifully and preventing sticking.
- Garlic: Fresh minced garlic infuses a wonderful aroma and savory depth.
- Mustard: A touch of Dijon or whole-grain mustard adds a tangy kick.
- Paprika: Provides a hint of smokiness and a lovely color.
- Salt and Freshly Ground Black Pepper: The foundational seasonings for enhancing all other flavors.
Toss all these ingredients together in the same bowl you microwaved them in. Ensure every sprout is evenly coated.
Mastering the Grill: Techniques for Optimal Results
Whether you're using an outdoor gas or charcoal grill, or even an indoor electric grill, the principles remain largely the same for perfectly grilled Brussels sprouts.
Setting Up Your Grill
- Medium Heat is Key: Preheat your grill to medium heat. You want enough warmth to caramelize and char, but not so high that the outsides burn before the insides are tender. If using a charcoal grill, aim for coals that are glowing and covered with a light ash.
- Indoor Grill Option: Don't have an outdoor setup? An indoor plug-in grill works wonderfully for this recipe, offering similar convenience and great results.
Grilling Methods: Skewers vs. Foil Packets
You have a couple of excellent options for getting your sprouts onto the grill, each with its own advantages.
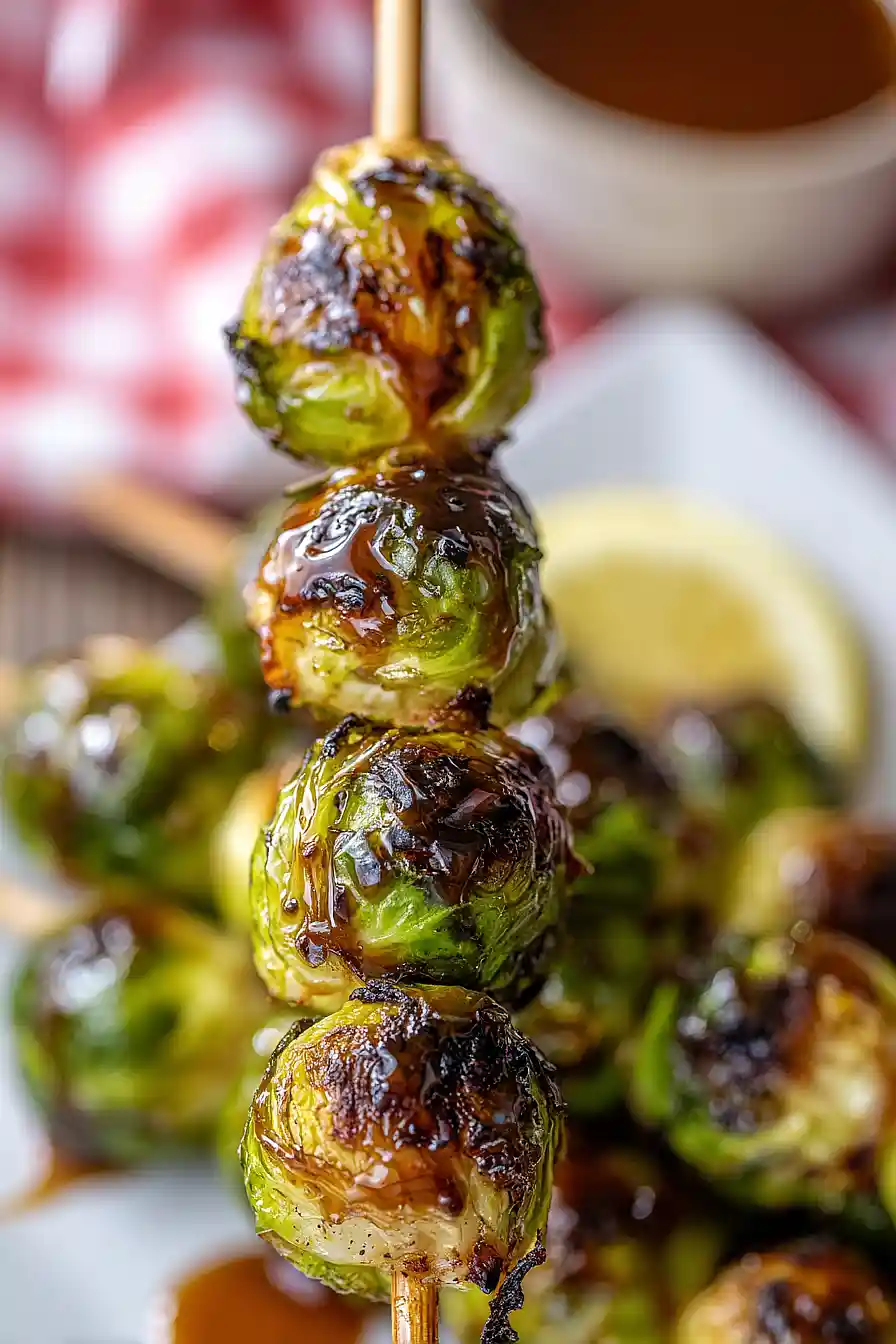
- Skewering: This method allows for direct contact with the flame, promoting maximum char and easy flipping.
- Technique: Thread 4 to 5 Brussels sprouts onto each metal skewer (or use pre-soaked wooden skewers to prevent burning). Arrange them with their stem ends facing in the same direction and leave at least 1/2 inch of space between each sprout for even cooking. This allows for better airflow and browning.
- Grilling Time: Place the skewers onto the grill with the stem ends closest to the flame first. Cover and cook for 5 minutes. Turn the skewers over and continue to cook for another 5 minutes, or until tender-crisp and nicely charred.
- Foil Packet: Ideal for larger batches or if you prefer a less direct char, a foil packet helps contain all the delicious seasonings and prevents any small pieces from falling through the grates.
- Technique: Place your seasoned sprouts in the center of a large piece of heavy-duty aluminum foil. Gather the edges and seal tightly to create a packet.
- Grilling Time: Place the foil packet directly on the grill grates over medium heat for 10-15 minutes, flipping once halfway through. The sprouts will steam within the packet while still getting some smoky flavor. For a crispier finish, you can open the packet for the last 5 minutes.
Elevating Your Grilled Brussels Sprouts: Flavor Enhancements & Serving Ideas
While a simple seasoning is delicious, there are countless ways to take your grilled Brussels sprouts from great to absolutely extraordinary.
Signature Sauces and Dips
- Tangy Wasabi Dip: For an unexpected kick, whip up a simple dip of equal parts wasabi paste and sour cream. The creamy heat is a fantastic counterpoint to the sprouts' sweetness.
- Balsamic Honey Glaze: This popular combination adds a wonderful balance of sweet and tangy. After grilling, toss your sprouts with a glaze made from balsamic vinegar, honey, and a pinch of red pepper flakes for extra spice. This transforms them into a truly gourmet experience. Learn more about this amazing combination in our article: Balsamic Honey Grilled Brussels Sprouts: A Flavorful Side.
- Lemon-Tahini Drizzle: A creamy, zesty dressing made from tahini, lemon juice, water, and a touch of maple syrup offers a Mediterranean twist.
Post-Grill Finishing Touches
- Toss with Leftover Oil: After removing the sprouts from the skewers, return them to the original mixing bowl and toss with any remaining oil and garlic mixture. This ensures every sprout is coated in maximum flavor.
- Fresh Herbs: A sprinkle of fresh parsley, chives, or thyme adds brightness.
- Cheese: Shaved Parmesan or crumbled feta cheese adds a salty, savory layer.
- Nuts or Seeds: Toasted slivered almonds, pecans, or sunflower seeds provide a delightful crunch.
- A Touch of Heat: If you enjoy spice, a sprinkle of red pepper flakes or a dash of cayenne pepper can be added to your seasoning or glaze.
Storing and Reheating Leftovers
While grilled Brussels sprouts are best enjoyed fresh off the grill, leftovers can be stored and reheated. Place them in an airtight container and refrigerate for up to 4 days. To reheat, spread them evenly on a baking sheet and warm in a preheated oven at 350°F (175°C) for 5-10 minutes, or until heated through and slightly re-crisped. Avoid the microwave for reheating if you want to maintain their texture.
From a quick weeknight dinner to a festive holiday spread, grilled Brussels sprouts are a versatile, flavorful, and incredibly easy side dish that deserves a permanent spot in your culinary repertoire. With these pro tips, you're not just cooking a vegetable; you're creating a memorable experience that will delight your taste buds and impress your guests. So fire up that grill, gather your sprouts, and get ready to enjoy a truly exceptional dish!
